VMworld 2017 - First day

Although VMworld doesn’t officially start until Sunday or depending how you look at it, Monday; the whole weekend leading to it is an amazing opportunity to get familiar with the huge Mandalay complex, find out where the different places are located and of course one of the best parts of the show… meet fellow technology enthusiasts. This is one of the most valuable things of attending the conference in my opinion.

A day and a half in and I have probably already met 20+ new vFriends from the community and have had excellent conversations about the cloud, infrastructure, automation and even great personal experiences.

One of the anticipated moments for me was to meet Al Rasheed who won the conference pass I was able to donate to the vCommunity last month; Al had never attended VMworld before and just 24 hours in, he is thrilled and having a lot of fun. He has already taken a picture with VMware CEO Pat Gelsinger.


This time around it is also very important to me to be here to meet my new team and continue learning about the TAM role and the organization in general. On Sunday, I attended the TAM Reception, talked and learned a bunch from TAM customers, their feedback about the program and how much they value the relationship.


The first official party of VMworld 2017 was the VMUG Party and as expected, it didn't disappoint; the food was great and the band was simply amazing. They rocked the house and gave us an awesome time to start the week with the right foot.


Getting together with my vBrownBagLATAM friends is always a pleasure and we had a chance to have dinner after the VMUG party. As usual we had a great time.


I am looking forward to the coming days being as amazing as the first one, to the different announcements VMware will have, specially related to the partnership with AWS and to meeting new friends in the community and create lasting relationships.


Opportunity knocks


-CHANGE-

"Is a necessary part of life. Be willing to surrender what you are for what you could become."


After three amazing and worthwhile years as a Sr. Infrastructure Engineer leading the VMware platforms at Bain Capital, I will be leaving at the end of this week to take on a new and exciting opportunity for my career.
Not only am I leaving the company but the city of Boston and the State of Massachusetts where I have grown professionally and have met truly amazing people.

I will be relocating 500 miles south to the Washington Metropolitan area and join VMware as a Sr. Technical Account Manager.

This will certainly be a life changing event for me and my family, but it is one that we're all looking forward to positively and with great enthusiasm.

There is a lot we are giving up, but in my mind, is not what we are leaving behind but the possibilities of what we could gain; in my mind, I see a great future for me and my loved ones and hopefully a lot less snow to shovel during winters. 😊


VMworldbound Contest

After some consideration, here is how the winner of the #VMworldbound contest will be selected.

On Tuesday August 1st, seven finalists will be picked by William Lam and myself; these people will be notified and expected to confirm no later than Wednesday morning at 9am EST that if they win the VMworld Pass, they will be able and planning to attend, for sure.
The idea and point of this giveaway is to make sure this pass is not wasted and provide someone in the community the opportunity to enjoy a great conference. 
If any of the finalists can't make it for whatever reason, another person not initially picked will enter the "Selected 7".

Announcements for finalists will be made on Twitter and/or via the medium the finalist used to submit her/his entry. The soonest a confirmation of attendance is received the better.

On Wednesday night I will be broadcasting on Periscope the actual drawing and selection of the winner. The names of finalists will be placed in a bag/hat/box (or whatever container I find) and a lucky one will be pulled. 

If you want to be notified and watch the live broadcast, even if you're not participating, you'll need to enable account notifications on Twitter.

Give this a try, you never know what the future may bring.

Good luck to all participants!


Free VMworld Pass Contest

Would you like to go to VMWorld and don't have a pass? 
If your answer is yes, read on... You may be the lucky winner of a free registration code for it.

I want to give someone the possibility of attending VMworld 2017 in Las Vegas next month, so I'm giving away a validated registration code for the big conference to a lucky person in the vCommunity and hopefully make a difference in that person's career.

Ideally, the gal or guy would be someone who has not attended VMworld before, although having attended in the past doesn't disqualify you from participating :) 

Would like to see a person who is enthusiastic about virtualization, eager to learn and to take full advantage of everything this event has to offer.


Having attended my first and only VMworld last year made me realize the immense value this conference presents if you take advantage of its opportunities; you get to see great stuff on the different breakout sessions, practice and learn the latest products and/or features from VMware in the Hands-on-Labs, meet amazing and smart people and have tons of fun in the process.

When the additional registration code became available to me this week, I thought of contributing it to somebody who may not have the chance of attending and giving that individual the opportunity to experience the awesomeness that I enjoyed last August.

So, for a chance to win, comment on this blog or use hashtag #VMworldbound on Twitter and list the reasons why you would like to attend VMworld 2017. Make sure you tag @lamw and myself @j_kolkes if using Twitter.


Community leader William Lam will be picking and announcing the winner on August 2nd.

The only requirements are:
  • You want and are able go to VMworld2017 in Las Vegas.
  • You can cover flight and hotel expenses. They're not included in this giveaway.
  • You promise to meet with William and myself for a drink and picture while at the event ;)

Update: Click here to learn how the winner will be selected.


.NEXT, what I'm expecting.

Back in December 2016 the vBrownBag Community sponsored by technology companies, gave out prizes to its followers; some prizes included brand sunglasses, drones and other cool stuff; I don't remember the complete list but there were many. One of the most highly valued prizes was a pair of passes to the Nutanix .NEXT Conference in Washington DC. I was one of the lucky winners, so I'm getting ready to take advantage and attend the 3 day event this week for the first time. 


As a virtualization enthusiast, I enjoy learning different technologies, products and solutions; unfortunately, Nutanix isn't a solution I have used in the past, not because I don't want to, but because I haven't had a chance to really kick the tires and dive into it a bit deeper. I understand Nutanix's solutions based on presentations and documents read, but the way my brain absorbs the most is by doing or in this case by actually using and navigating the application; so I am anticipating to hit the Nutanix Labs hard this week, ask many questions during the different sessions and talk with NTC's and hopefully become a more knowledgeable HCI / Nutanix / Acropolis / Prism / Enterprise Cloud user myself. 
Of course this being a large conference where many of the community users attend, I also expect to see my old friends and make new ones! 


These types of conferences are a great opportunity to network, meet other professionals and of course learn a bunch; I'm looking forward for all these expectations to be fulfilled during the .NEXT Conference this June 28th through 30th. If you see me there, say hi 😉


Zerto, my Notes and Thoughts

Earlier this year, I was involved on a POC for Zerto Virtual Replication in a VMware environment and took some notes of things that I liked and found useful about the product and the way it works.

I wanted to share here some of the things I have learned, for my own reference and obviously for anyone out there who is starting with the product and may find these notes useful. A disclaimer here though: Things you read here could have been misinterpreted or misunderstood by me and you should research and use Zerto's Technical Documentation if you plan on implementing it in your production environment.

Overall, I really like Zerto; it is intuitive and simple to use, yet very powerful and complete application that will allow you to protect virtual machines with RPO in seconds and give you very convenient features.

Let's review some basic acronyms and components you need to be familiar with:
Zerto Virtual Manager or ZVM: It is the central management interface installed on a Windows server, it allows you to manage all the DR tasks related to your source and target sites. You need one ZVM per vCenter Server.
Virtual Replication Appliance or VRA: This is the appliance deployed to each one of the hosts in the cluster where the VMs you intend to protect reside, as well as in the target hosts. These appliances manage the actual replication of data from source to target site. VRA's run Debian Linux for operating system.
VPG: Virtual Protection Group; it is the grouping of servers that replicate with the same parameters or settings; often used to group servers of the same application stack, so they can be tested and recover together. Important as when you failover to a Checkpoint, they are all consistent.

From my personal point of view and own experience I will list some of the features and cool options in no specific order.

The installation process: It cannot be simpler. Installing Zerto is straightforward process; you will need one Windows Server to install the software and link it to its dedicated vCenter Server. The software requires a minimum of 4GB of free space. The installation wizard offers two options; one is the “Custom installation” which will give you the opportunity to select a specific account to run the Zerto Virtual Manager service, the ability to choose an external or embedded database. The “Express installation” will use embedded database and run its service as Local System. Regardless of the option, you will need to enter the FQDN of your vCenter, an account with permissions and a Site Name. From the installation wizard you can choose to participate in the Online Services and Zerto Mobile Application which will give you access to Zerto Analytics which is a great new tool that's expanding. At the end of the wizard communication and credentials to vCenter are validated; if there are any issues, a warning will display. Installation completes within 5 minutes.

Logging in for the first time: You access Zerto from a browser on port 9669 (https://DR-vCenter.kolkes.com:9669/zvm).
You need to provide a license key when you first login, so you either enter a the key manually or pair with another site that is already licensed and running.
Its HTML5 interface is clean and very responsive, you see multiple tabs where you configure different things but one thing I found useful in this product is that you can access and initiate many tasks from various places in the UI. 
On a brand new installation there will be pop-up messages that will guide you through finalizing the setup and things you need to do in order to start protecting your VMs.

Main Zerto management screen


The tabs in the UI are intuitive but here is a quick summary of them:

PowerCLI Poster Giveaway Contest

For the last few months I have really been interested in improving my PowerShell and PowerCLI skills. I've been watching Pluralsight courses and using every opportunity to perform tasks or obtain reports from the command line instead of using the GUI - when time allows :-) 
After seeing the PowerCLI poster available from VMware, I wanted to get my hands on one but after asking the gurus for a copy and finding out they didn't have additional ones, I resorted to printing my own from the PDF VMware provides here.  I ordered 3 posters and they came out very nice... In full (recommended) size 39x19 inches and laminated for durability; here's the one in my cube..


Having a pair extra I wanted to have a contest to give them away, so I initially thought of offering them to anyone who could teach me the best PowerCLI trick, something advanced and useful, but soon I realized that advanced users may not benefit from having the poster as much as someone starting to learn PowerCLI, so the idea changed quickly and an update was posted. Brian Graf and Kyle Ruddy accepted to be the judges at and select the winners few days later.


Many people did not follow the rules and were simply asking for the poster until Brian Graf tweeted this: 

Reporte de VMs con su promedio de CPU

Cuanto más aprendo PowerCLI, mas quiero aprenderlo y practicarlo. Cada que tengo una oportunidad de usarlo para automatizar o crear reportes en vez de otra herramienta que quizás me pueda brindar lo mismo utilizando el GUI, prefiero forzarme a hacerlo desde la línea de comando – es una buena excusa para practicar y mejorar en este lenguaje.

Recientemente mi jefe me pidió un reporte de las máquinas virtuales que son protegidas con Array Replication; él quería que listara el nombre, CPU, memoria, capacidad de disco asignada y el promedio de uso de CPU de cada VM. Las VMs residen en vCenters independientes pero tienen un común denominador y es que residen and datastores que utilizan un nombre propio, o al menos parte del nombre es igual “RPL”, para fácil distinción obviamente.

Dos de las propiedades que deberían estar en el reporte no me resultaba ponerlas en el reporte de una manera visualmente agradable; agregar ProvisionedSpaceGB resultaba en un numero de muchísimos dígitos y conseguir filtrar el promedio de uso de CPU en la última semana no fue inicialmente fácil.
Gracias a Google y los muchos blogers que sin egoísmo comparten scripts y soluciones, pude encontrar la manera correcta de generar el reporte con un One-liner básicamente.

Quiero dejarlo aquí para mi propia referencia, pero también con la esperanza que alguien más lo encuentre beneficioso.


Get-Datastore RPL* | Get-VM | Select Name,NumCpu,MemoryGB,@{n="Provisionedspace(GB)"; E={[math]::round($_.ProvisionedSpaceGB)}},@{N="CPU Usage (Average), Mhz" ; E={[Math]::Round((($_ | Get-Stat -Stat cpu.usagemhz.average -Start (Get-Date).AddDays(-7) -IntervalMins 5 | Measure-Object Value -Average).Average),2)}} | Export-Csv C:\FileName.csv -NoTypeInformation


Esta parte nos proveé la abilidad de redondear el total de GB envez de presentar un numero con mas de 10 digitos.
@{n="Provisionedspace(GB)";E={[math]::round($_.ProvisionedSpaceGB)}}


Esta parte agrega el premedio de uso de CPU para cada VM en la ultima semana.
@{N="CPU Usage (Average), Mhz" ; E={[Math]::Round((($_ | Get-Stat -Stat cpu.usagemhz.average -Start (Get-Date).AddDays(-7) -IntervalMins 5 | Measure-Object Value -Average).Average),2)}}


Query average CPU of replicated VMs

As I continue to learn PowerCLI and PowerShell in general, I appreciate when there is a request for any kind of report with some values that may not come in 'canned' presentation. Few weeks ago, I was asked to schedule a report of all of the replicated VMs with their provisioned space and average CPU usage among other values. Without even looking to see if the Web Client GUI or other tools could provide this information; I wanted to use a PS One-liner, not only for my own practice but because it can be easily scheduled to run weekly or monthly.

For the basic query and filtering, I have watched enough PowerCLI videos on Pluralsight (😉) to know how to filter out certain VMs and get many of their properties. In this case, all replicated VMs reside on datastores with a common part of the name, so that was simple; but rounding the ProvisionedSpace in GB to fit nicely in Excel and listing the Average CPU usage for the last week was not, at least for me. Thankfully, we have Google and many unselfish bloggers who have shared how this type of properties can be displayed properly.

Below is the command I'm using and as always just wanted to post it here as reference for the future and in hope that someone else may find it useful.

The command will list VMs residing on datastores with "RPL" in their name; display the VM's Name, allocated CPU and RAM, ProvisionedSpaceGB rounded and Average CPU usage for the last week; this will be exported as a .CSV file.

Get-Datastore RPL* | Get-VM | Select Name,NumCpu,MemoryGB,@{n="Provisionedspace(GB)"; E={[math]::round($_.ProvisionedSpaceGB)}},@{N="CPU Usage (Average), Mhz" ; E={[Math]::Round((($_ | Get-Stat -Stat cpu.usagemhz.average -Start (Get-Date).AddDays(-7) -IntervalMins 5 | Measure-Object Value -Average).Average),2)}} | Export-Csv C:\FileName.csv -NoTypeInformation


This property rounds the Provisioned Space in GB, otherwise it will display a very long number.
@{n="Provisionedspace(GB)";E={[math]::round($_.ProvisionedSpaceGB)}}


This part averages the CPU for the last week.
@{N="CPU Usage (Average), Mhz" ; E={[Math]::Round((($_ | Get-Stat -Stat cpu.usagemhz.average -Start (Get-Date).AddDays(-7) -IntervalMins 5 | Measure-Object Value -Average).Average),2)}}


Como agregar Standard Switches y/o PortGroups con PowerCLI

Metodo para agregar Standard Switches y/o Port Groups a todos los hosts en tu cluster usando PowerCLI cuando no existe Switch Distribuido (VDS).

Cuando un Switch Distribuido (VDS) no está presente en el ambiente, bien sea por no tener licencia Enterprise Plus o por cualquier otro motivo y en vez se usan Standard Switches (VSS) en cada uno de los hosts; la configuración y nombre de tus VSS y sus Port-Groups deben ser identicas, de lo contrato sabemos que errores podrían ocurrir al intentar hacer vMotion por ejemplo.


Si es necesario agregar o editar uno o mas Virtual Standard Switches y/o Port-Groups a tus hosts, PowerCLI hará esta tarea mucho más fácil, rápida y consistente. 

En vez de agregar cada uno de los VSS y/o Port-Groups de manera manual y repetitiva atravez del GUI o incluso usando ESXCLI en cada host con sesiones SSH; puedes hacer estas configuraciones con un par de líneas en PowerCLI.


Iniciamos creando una variable de los hosts que necesitas modificar:

Bien sea incluyendo todos hosts que usan parte del nombre, con un * como wildcard:

  
Agregando uno de tus clusters completos, si es que existe mas de uno:


O listando los hosts individualmente, si por algun motivo esto fuera necesario:


Si el VSS no existe y debes agregarlo, puedes usar el siguiente syntax para crearlo en todos los hosts contenidos en tu variable $Labhost:


El anterior ejemplo usa -MTU y -NumPorts para modificar estos de su defecto, pero esos parametros no son obligatorios y se pueden omitir.

Despues de crear el VSS o si ya existe y solo necesitas crear nuevos Port Groups, debes identificar el nombre del VSS donde seran agregados. En este ejemplo el resultado sera que en todos los hosts incluidos en la variable $myhosts, se creara un Port-Group llamado Replication-vlan en el switch vSwitch3 tageado con VLAN 405


Nota: Los diferentes comandos, variables y las imagines no necesariamente son relacionadas unas con otras, como puedes ver en el penultimo ejemplo para agregar un VSS el nombre de la variable y el VSS no concuerdan con los otros casos en este post. Estan ahi como demostracion y referencia.


My road to vExpert

vExpert: wow that guy works for VMware and must know it all. 

When I first started seeing and hearing the term vExpert in the different community virtualization events, podcasts, webinars and on people's Bio's on LinkedIn and Twitter, I thought it was a selective distinction for a very few, top product specialists within VMware; I believed it to be some sort of certification for its employees.
Later on, I noticed how others outside VMware also called themselves vExperts; but these individuals were known bloggers and virtualization community heavyweights; then I thought, maybe they get the privilege since they are so well versed in the technology and have proven it with their presentations, blog posts and even books. 

I didn't bother to look at the requirements for that "certification" or what it really meant, instead I just kept focused on VCP and VCAP just assuming vExpert was out of reach.

It wasn't until I started engaging more in the Boston VMUG and with the vBrownBag and LATAM crew that I realized the vExpert recognition was for the Community, for enthusiasts and evangelists of the technology. Even then, my assumption was that it would take an enormous amount of dedication, commitment and actual high technical expertise to become one.

My interest in attaining this award grew as I became aware of a key benefit: being able to use VMware products in a Home Lab; What? Have the ability to practice in your home gear without reinstalling every 60 days? Great, I needed to start putting the effort and pursue this recognition from VMware; I enjoy virtualization and this will only allow me continue learning and growing in that space. That benefit by itself is huge, the other perks are also very valuable, I'm not underestimating their value.

Found my mentors: Ariel Sanchez y Los Muchachos de vBrownBagLATAM 😊

Alternative method to P2V large volumes/LUNs

When P2V'ing a server that uses large LUNs for one or more of its volumes, there is an alternative method I have found very practical as it takes less time for initial conversion, allowing me to validate that the OS will load and work fine, quicker. 
There have been instances when, after a long P2V process, the VM doesn't work well for whatever reason and the whole conversion time was essentially lost; if it included few terabytes of data, we could be talking of many hours wasted.

Let's say you have a physical Windows system you wish to convert to virtual and it contains multiple volumes/LUNs. If one or more of the volumes are very large, say more than 1TB; I have found that excluding them in the original conversion is better in some specific cases... WHAT? What are you thinking? Why would you do that?   Read on...

The approach is to exclude the large volume(s) during the P2V task and once you have it as a virtual machine and the source system is powered off, map that same LUN or LUNs from your SAN to the ESXi nodes hosting your new Virtual Machine, then present the LUN as a Virtual RDM to your VM. Following this, power on the VM and make sure you can logon to your virtual Windows system, have no issues mounting and accessing the volume normally inside the guest OS. Finally in order to make that last volume also virtual, you perform a Storage vMotion only for the Virtual RDM disk, making sure you select the Advanced section from the wizard and pick either Thin or Thick Provisioning type for the destination.

After the Storage vMotion completes, the original source LUN will still be there in your SAN and you need to unmap it from your hosts and recycle it or do whatever you plan to do with it. 


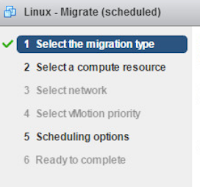
Schedule tasks right from the menus of the Web Client.

Did you know that a few actions for vCenter objects can be easily scheduled and that the option is readily accessible from Web Client menus?

A handful of tasks can be configured to run at a later time with a simple trick: when you expand the menu for an specific object, either by right-clicking the object or selecting 'Actions' drop-down, press and hold the CTRL key and you'll see a clock for the actions that support setting a schedule.


You must click the action while keeping the CTRL key pressed in order to see the Scheduling options, otherwise it won't appear.
 

The wizard will have the section to set the schedule for the intended task. Click the 'Change' option to configure the scheduler. 

SRM Bubble Test - Automate IP settings different from those in the Recovery Plan

The capabilities of PowerShell/PowerCLI always intrigue me; when I'm tasked with any project or objective where its usage saves time, increases consistency and makes work more efficient, I look for methods to integrate it. Not being exceptionally proficient with it requires me to often research and test, but it's well worth it when the results achieve the target goal consistently and productivity improves.

I was once involved in repetitive, planned Disaster Recovery Tests (Bubble Tests) that had a very specific requirement: The failed over VMs in the isolated network needed to have IP settings that varied from the settings of their SRM Recovery Plans. Changing the actual Recovery Plan settings for each one of the involved VMs and groups was not allowed - If there was ever a need for a true fail over event and the Recovery Plan was modified, that would not have been good, plus that would mean changing the entries back after the tests completed.
Initially the IP, Default Gateway and DNS values for the VMs in the 'Bubble' were manually changed from the console; this method consumed a lot of time as we needed to do it for multiple machines, it was prone to errors and had to be done every time the Bubble Tests were ran.

Invoke-VMScript cmdlet, is an amazing tool! 

The goal was to change IP, Subnet, Default Gateway and DNS values. Since the bubble tests were repeated, it was worth taking the time to build the commands for each VM.