Alternative method to P2V large volumes/LUNs

When P2V'ing a server that uses large LUNs for one or more of its volumes, there is an alternative method I have found very practical as it takes less time for initial conversion, allowing me to validate that the OS will load and work fine, quicker. 
There have been instances when, after a long P2V process, the VM doesn't work well for whatever reason and the whole conversion time was essentially lost; if it included few terabytes of data, we could be talking of many hours wasted.

Let's say you have a physical Windows system you wish to convert to virtual and it contains multiple volumes/LUNs. If one or more of the volumes are very large, say more than 1TB; I have found that excluding them in the original conversion is better in some specific cases... WHAT? What are you thinking? Why would you do that?   Read on...

The approach is to exclude the large volume(s) during the P2V task and once you have it as a virtual machine and the source system is powered off, map that same LUN or LUNs from your SAN to the ESXi nodes hosting your new Virtual Machine, then present the LUN as a Virtual RDM to your VM. Following this, power on the VM and make sure you can logon to your virtual Windows system, have no issues mounting and accessing the volume normally inside the guest OS. Finally in order to make that last volume also virtual, you perform a Storage vMotion only for the Virtual RDM disk, making sure you select the Advanced section from the wizard and pick either Thin or Thick Provisioning type for the destination.

After the Storage vMotion completes, the original source LUN will still be there in your SAN and you need to unmap it from your hosts and recycle it or do whatever you plan to do with it. 


Schedule tasks right from the menus of the Web Client.

Did you know that a few actions for vCenter objects can be easily scheduled and that the option is readily accessible from Web Client menus?

A handful of tasks can be configured to run at a later time with a simple trick: when you expand the menu for an specific object, either by right-clicking the object or selecting 'Actions' drop-down, press and hold the CTRL key and you'll see a clock for the actions that support setting a schedule.


You must click the action while keeping the CTRL key pressed in order to see the Scheduling options, otherwise it won't appear.
 

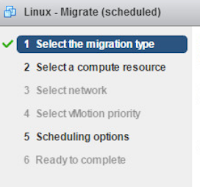
The wizard will have the section to set the schedule for the intended task. Click the 'Change' option to configure the scheduler. 

SRM Bubble Test - Automate IP settings different from those in the Recovery Plan

The capabilities of PowerShell/PowerCLI always intrigue me; when I'm tasked with any project or objective where its usage saves time, increases consistency and makes work more efficient, I look for methods to integrate it. Not being exceptionally proficient with it requires me to often research and test, but it's well worth it when the results achieve the target goal consistently and productivity improves.

I was once involved in repetitive, planned Disaster Recovery Tests (Bubble Tests) that had a very specific requirement: The failed over VMs in the isolated network needed to have IP settings that varied from the settings of their SRM Recovery Plans. Changing the actual Recovery Plan settings for each one of the involved VMs and groups was not allowed - If there was ever a need for a true fail over event and the Recovery Plan was modified, that would not have been good, plus that would mean changing the entries back after the tests completed.
Initially the IP, Default Gateway and DNS values for the VMs in the 'Bubble' were manually changed from the console; this method consumed a lot of time as we needed to do it for multiple machines, it was prone to errors and had to be done every time the Bubble Tests were ran.

Invoke-VMScript cmdlet, is an amazing tool! 

The goal was to change IP, Subnet, Default Gateway and DNS values. Since the bubble tests were repeated, it was worth taking the time to build the commands for each VM.